Archive for the 'Pasta' Category

Lent = More $$$ in the bank and less turkey sandwich lunches for the hub.

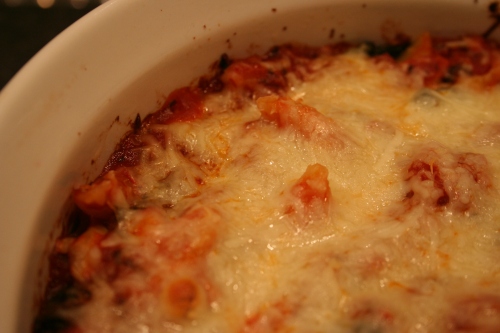
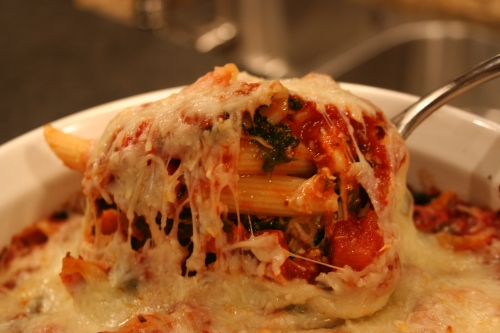
Who knew that Lent and eating on a budget could combine forces to create such an easy and delicious dinner?!  Normally I serve fish on Friday’s during Lent, but when salmon filets or tilapia aren’t on sale, pasta is certainly a more economical alternative.  I load it up with mozzarella cheese, so Gus isn’t completely deprived of protein for one night.  Aside from being budget friendly, this dish doesn’t require much prep time in the kitchen.  Plus, baked pasta dishes freeze very well, so Gus already has some lunches waiting for him in the freezer…all they need now is a lil’ suga from his doting wife.  A brown bag lunch isn’t complete in my house without 1). a schmoopie love note and 2.) a piece of candy.  You’ll never go back to buying lunch again once you get a lunch a la Cucina di Daniella style.

img_7162

img_7170

img_7183

img_7197


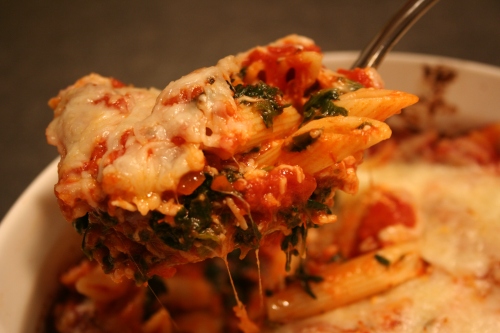
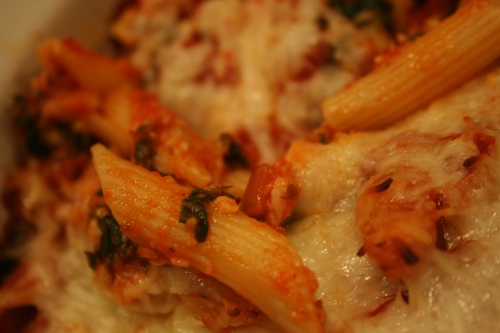
Veggie Pasta Bake

  • 1 lb. Penne Pasta (really any noodle will do…penne and rigatoni happen to be my favorites in this type of dish though)
  • 3 cups Marinara Sauce (The Italian in me will tell you that it better be Grandma’s homemade sauce…but if you’re in an extremely dire situation, then I would point you to the nearest jar of Classico Sweet Basil sauce…not that I would know anything about any type of jarred pasta sauce.  I swear, Grandma.)
  • 1 box Frozen Chopped Spinach
  • 1 can Diced Tomatoes (Grandma’s sauce is very smooth, so I like to add a can of chunky tomatoes when I make a veggie pasta to make it a bit more hearty)
  • 2 cups Baby Portabella Mushrooms, sliced
  • 2 tsp. Extra Virgin Olive Oil
  • 1 clove Garlic, minced
  • 1 small Onion, chopped
  • 2 cups Shredded Mozzarella Cheese
  • 1/2 cup Grated Parmesan Cheese


  1. Preheat the oven to 350 degrees.  Cook the pasta according to the package, or al’ dente and set aside.  Steam the frozen spinach in the microwave and drain any excess water from the cooked spinach. 
  2. Heat the olive oil over medium heat in a saute pan.  Add the onions and garlic and cook until soft.  Add the mushrooms and lower heat to medium low.  Cook until the mushrooms reduce to half, then season with salt and pepper.  (Don’t season before the mushrooms cook down or you’re shrivel them up into little salty sponges.)
  3. In a casserole dish, spoon about 1/2 cup of tomato sauce on the bottom.  Add 1/2 the pasta, then layer with 1/2 the spinach, mushrooms, diced tomatoes, tomato sauce, mozzarella and parmesan cheese.  Repeat the layer with the remaining ingredients. 
  4. Cover the casserole dish with tin foil and bake at 350 for 30 minutes.  Remove the foil after 30 minutes of cooking and continue to cook for another 15 minutes uncovered or until the cheese is melted and bubbly. 

I’ve crossed the finish line…but now it’s time for the marathon blog post.

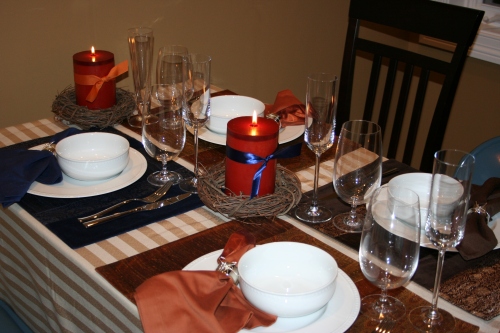
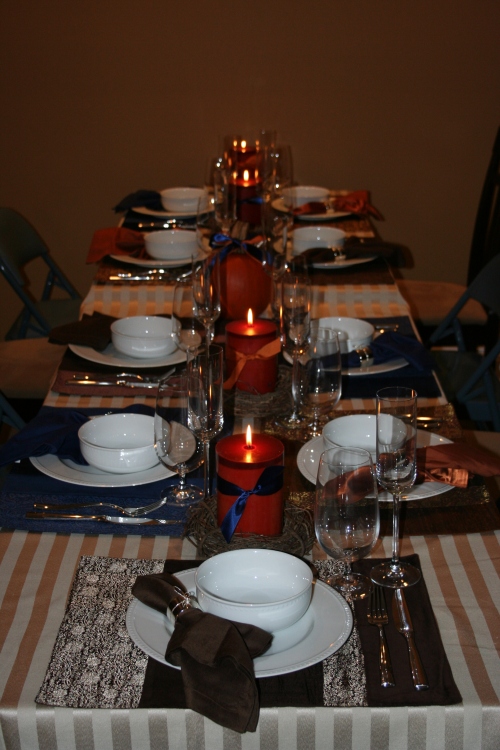
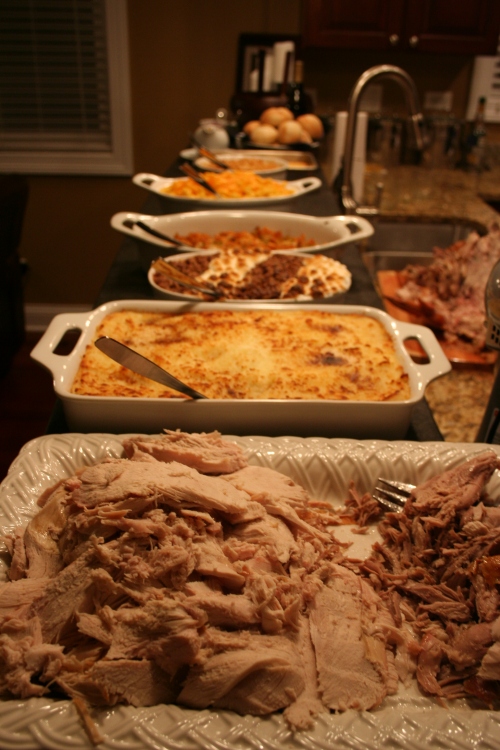
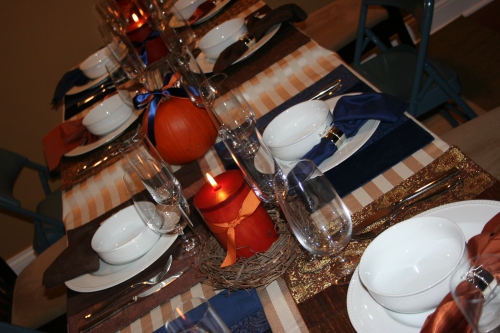
After spending over 24 hours in my kitchen in 2 days, I am happy to report that the Pre-Thanksgiving dinner party was a success and I think we might just make it an annual tradition!  I did have some crazy thoughts on Saturday about perhaps throwing a Christmas dinner party in just a couple weeks, but after Gus did about 2 hours of dishes after the party, I was certain there was no way of convincing him of that.  There were no major food flops, so that was a relief, but I will say that next year we are definitely going with a bigger bird!  We had a 20 lb. bird and 9 guests…apparently the little calculator on Butterball.com didn’t realize that most of my guests had decided to fast that day in preparation and were quite ravenous when it came time to dig into the poultry.  A cook can’t complain though when there are hardly any leftovers!  As exhausting as all the preparations were, the evening was one filled with great company, lots of laughter, and much thanksgiving for all of our blessings.  And now I can start updating my 11 page planning guide for next year’s party! 
img_5170 

img_5166

img_5171

img_5217


Roasted Turkey (aka, The Main Event, The Star of the Show, The Big Kahuna, our good friend, Tom.)

There isn’t much of a recipe to post, so I’ll just give you my Turkey Tips.   The turkey is probably the easiest dish to make, and yet, the one that most people screw up (think dry, cardboard-like poultry…overcooking is such a tragedy).  Now, I have only made 2 turkey’s in my lifetime, but both were very moist and delicious…if I do say so myself.  I may not have years of experience, but I do have a few turkey tips to share:

  • Brine it!  Grab the biggest bucket you can find from Home Depot and dissolve 1 cup of Brown Sugar and 1 cup of Salt in 2 gallons of cold water.  Add 2 quartered lemons and 2 quartered oranges, plus a few sprigs of rosemary and thyme.  Chill your bird in the brine for 24 hours. 
  • Grease it!  Melt one stick of butter and add a couple tablespoons of vegetable oil to the melted butter.  Stir together and then generously brush the mixture over the entire turkey for a brown, crispy skin.
  • Leave it!  Once you put that bird in the oven, don’t you touch that oven door!  That’s right…throw out that turkey baster and let the oven do the work because you aren’t helping at all by letting all the heat out of the oven. 
  • Watch it!  Well, not for the full few hours, but near the end you should keep on eye on the thermometer.  Once you see it hit 165 degrees, then you are allowed to open the oven and remove your bird. 
  • Rest it!  Once it’s out, just let it be.  The juices are what keep your bird moist and if you cut into it before allowing it to rest than all those precious juices just run out of your bird. 

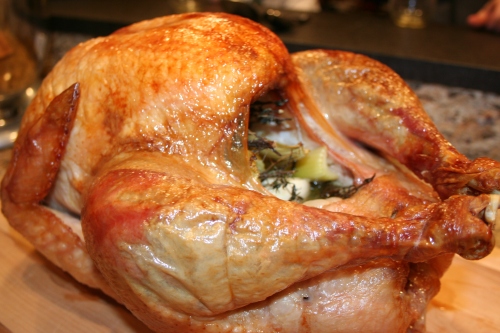
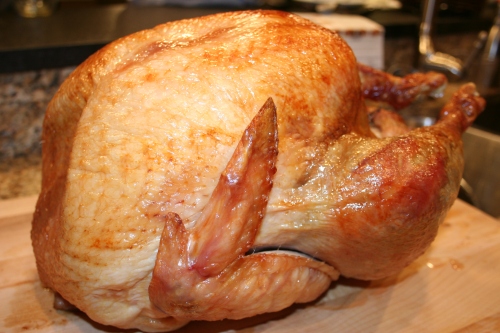
If you follow my tips, you will be rewarded with a bird like this…
img_5208

img_5213


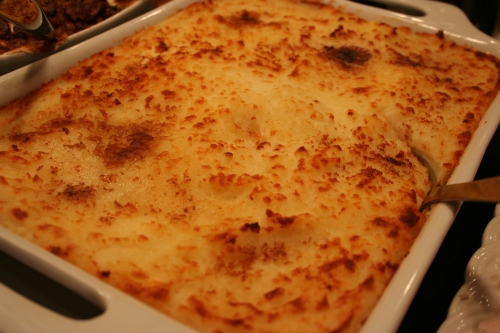
Mashed Potatoes (warning: these may be hazardous to your health…but very delicious to your tummy)

I was introduced to these heart-stoppers a couple years ago by my mother-in-law’s family friend, and I’ve loved her for it ever since.  These are definitely only for special occasions, as you can pretty much feel your arteries clogging up as you eat them…but that certainly doesn’t stop me from going up for seconds since I know I won’t make them again for another year.   And just when you think they couldn’t get any worse, you go and add butter to the top of the potatoes and broil them in the oven for a nice, browned, crispy top.  It’s heaven and hell all in one dish.  You already know about my love affair with kitchen gadgets, and mashed potatoes help fuel that affair…I like my mashed potatoes very, very smooth, so the secret is a potato ricer.   This gadget is under $15 and you’ll throw out your standard masher after you use one of these babies.  It’s much easier on the arms and there won’t be one lump in your taters. 
img_5222


  • 3 1/2 lbs Russet Potatoes, peeled and cut into 2 inch cubes
  • 12 tablespoons of Butter, divided
  • 1 1/2 cups Heavy Cream
  • 1/2 cup Sour Cream
  • 1/2 cup Cream Cheese
  • Salt and Pepper to taste


  1. Place the potatoes in a large pot and cover with cold water.  Salt generously.  Bring to a boil, then lower the heat and simmer uncovered for about 13 minutes or until the potatoes are fork tender. 
  2. While potatoes are boiling, melt 1 tablespoon of butter into a sauce pot.  Add the cream and 7 tablespoons of butter, being sure not to bring to a boil. 
  3. Drain the potatoes in a colander and rice the potatoes in a large mixing bowl.  Once all the potatoes have been riced, slowly add in the hot cream and butter.  Stir slowly and do not overwork or the potatoes will be heavy.  Add the sour cream and cream cheese.  Add salt and pepper to taste. 
  4. Spoon the potatoes into a greased baking dish and top with 4 tablespoons of cubed butter.  Broil for 3-5 minutes or until the top is browned and crispy.


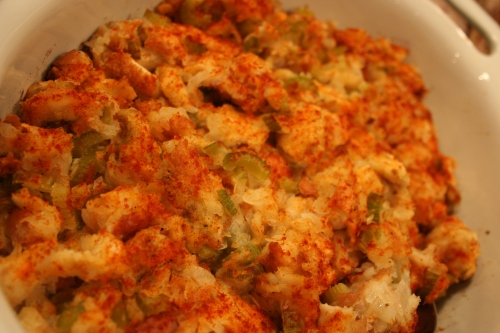
Grandma’s Famous Stuffing

It might just be famous to me and family, but this stuffing is darn good.  All other stuffing recipes I see use toasted, stale, dried out bread, but my Grandma’s stuffing has a soft, doughy, comforting texture because she found the secret ingredient…a loaf of fresh Wonder bread.  That’s right, my Italian Grandma looked right past the crusty, hard Italian bread and has made her stuffing with the American classic, Wonder bread, since I was a kid.  And always topped with a sprinkle of paprika…not sure if it’s just for color or she just likes paprika, but I don’t question it, I just replicate it.  It’s such a simple recipe, yet with all the stuffing recipes out there, no stuffing has ever come close to Grandma’s version. 
img_5226


  • 1 lb (1 loaf) Wonder Bread, cubed
  • 3/4 cup Butter
  • 3 Onions, chopped
  • 5 stalks Celery, chopped
  • 1 1/2 cups Mushrooms, sliced
  • 1/2 tsp. Dry Sage
  • 1 cup Chicken Broth
  • Salt and Pepper to taste
  • Paprika for the top


  1. Preheat the oven to 350 degrees.  In a Dutch oven, melt the butter over medium heat.  Cook the onion, celery and mushrooms until soft.  Season the veggies with the dry sage, salt, and pepper. 
  2. Stir in the bread cubes and moisten with the chicken broth.  Mix until the bread cubes are evenly coated. 
  3. Spoon into a buttered casserole dish and sprinkle the top with paprika.  Bake for 30 to 40 minutes. 


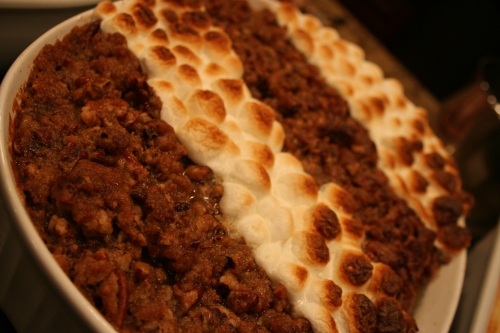
Sweet Potato Casserole (a nod to my Southern roots)

I didn’t know that I loved Sweet Potatoes until I lived in the South.  When my Mama served me my first taste of Sweet Potato Casserole, I swore she had lost her mind and was giving me dessert first.   Only Southern folks can cook something with butter, brown sugar, pecans, cinnamon, marshmallows, and then call it a “vegetable”.  Hey, I’m not going to argue with them though! 
img_52231


  • 3 cups Sweet Potatoes, mashed
  • 1/2 cup White Sugar
  • 2 Eggs, beaten
  • 1/4 cup Butter, melted
  • 1/2 cup Milk
  • 1 1/2 tsp Vanilla
  • 1 cup Brown Sugar
  • 1/3 cup All Purpose Flour
  • 1 cup Pecans, chopped
  • 1/3 cup Butter, melted
  • 1 cup Mini Marshmallows


  1. Preheat the oven to 350.  In a large bowl mix the sweet potatoes, white sugar, eggs, butter, milk and vanilla.  Spoon into a greased baking dish. 
  2. In a small mixing bowl, stir together the brown sugar, flour, pecans, and butter.  Sprinkle the mixture over the potatoes. 
  3. Bake for 35-45 minutes.  Remove from the oven and add the mini marshmallows.  Broil for 2-3 minutes or until the marshmallows are toasted. 


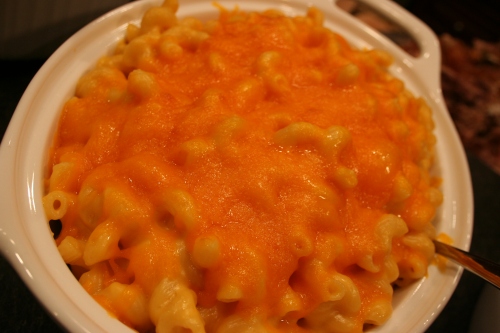
Best. Mac. and. Cheese. Ever. 

Like I said, not a traditional Thanksgiving dish but when your husband won’t touch sweet potatoes, stuffing, or green bean casserole, you end up taking requests.  I asked him to suggest a side dish or veggie that he liked and Mac and Cheese was his response.  How silly of me to think he would ask for something healthy like steamed asparagus or zucchini!  Thanksgiving isn’t really about the veggies anyways and I knew Mac and Cheese would be a crowd pleaser.  I’ve tried a number of different Mac and Cheese recipes and have always found room for improvement, but this one takes the cake.  It’s creamy and smooth, not custard-like with a bunch of eggs that turns your Mac and Cheese into a congealed mess.  It’s also adaptable based on your cheese preferences…if you are feeling more refined, try a Gruyere…feeling spicy, try a Pepper-Jack…feeling traditional, stick with a Sharp Cheddar and Monterey Jack blend.  It’s the ultimate comfort food and goes quite well with turkey and mashed potatoes…just ask my husband. 
img_5227


  • 1 lb.  Elbow Macaroni (or embrace your inner Italian and try Cavatappi)
  • 1 tbsp. Salt + 3 tsp. Salt
  • 5 tbsp. Butter
  • 6 tbsp. All Purpose Flour
  • 1 1/2 tsp Ground Mustard
  • 5 cups Whole Milk (Remember my motto?  Go big or go home.  Skim milk is for wimps when it comes to Mac and Cheese.)
  • 6 oz. Monterey Jack Cheese, shredded
  • 12 oz. Sharp Cheddar Cheese, shredded
  • 4 oz. Cream Cheese


  1. Bring 4 quarts of water to a boil in a Dutch oven.  Add macaroni and 1 tbsp. salt.  Cook until pasta is al dente.  Drain pasta and set aside.
  2. In the same Dutch oven, heat butter over medium high heat until foaming.  Add flour and mustard, and whisk well to combine.  Continue whisking until mixture deepens in color. 
  3. Gradually whisk in milk and bring the mixture to a boil.  Be sure to whisk constantly so mixture does not burn.  Once it has reached a full boil, reduce heat to medium and simmer while whisking occasionally until it has thickened to the consistency of heavy cream. 
  4. Take the mixture off the heat and whisk in all 3 cheeses and 3 tsp. salt.  Whisk until cheese is fully melted.  Add the pasta and cook over medium low heat, stirring constantly until the mixture is steaming and heated through. 
  5. Transfer mixture to a baking dish and sprinkle the top with cheese.  Broil for 3-5 minutes or until cheese is melted.


Whew…and that is just the blog worthy main course and sides, my friends.  We still have breads and desserts to get through, but we’ll save those for another time…because right now that leftover Mac and Cheese is calling my name…
The original Cucina…Cucina di Nonna.

There is just nothing more comforting than my Grandma’s sauce and meatballs (well, technically they are turkeyballs, but turkey is still a meat so meatballs it is).  A couple of years ago, I actually spent the whole day with Grandma to watch her make sauce and meatballs, so I could take copious notes and make them myself.  If your Grandma is anything like my Grandma, then you know what I mean when I say copious…Grandma doesn’t exactly follow a recipe.  It’s all in her head and everything is “as much’a you like”.  That cooking lesson at Grandma’s was priceless and I’m so happy that I’ll be able to pass on the recipes to my children one day.  Notice that I said my children…so that would exclude all of you loyal blog readers.  I love you, but I love my Grandma more so the sauce and meatball recipes are staying in la famiglia. 

Since I am a sweet Italian woman, I won’t leave you totally empty handed.  What else do you need if you are having sauce and meatballs???  PASTA!  Making your own pasta is not really that difficult, it just takes a lot of time and patience.  The end result is well worth the aching back and the flour covered kitchen.  The ingredients are simple, and with just a bag of flour and a carton of eggs, you can go from this…


To this…


To make pasta, I use my Kitchen Aid Mixer to help with the mixing, and the Pasta Attachment to do the rolling and cutting, but don’t let that fool you…you will still be standing over the machine, covered in flour for a couple hours.  If you don’t have a Pasta Machine, then forget it.  Crazy old Italian Nonna’s might roll and cut pasta by hand, without any help from a machine, but that is just nuts.  Either splurge on a Pasta Machine to help with the work or go buy some Buitoni in the refrigerator section of the market.  I won’t tell anyone. 

On this particular night, I was serving Pasta for 9 people, so I tripled this recipe and in typical Daniella fashion, had enough leftover for another dinner party for 9.  The good news is that while making fresh pasta is a lot of work, it freezes very well so make more than you need, and you can enjoy it for weeks to come. 


Fresh Semolina Pasta

  • 2 cups All Purpose Flour
  • 2 cups Semolina Flour
  • 6 extra large eggs
  • 1 tsp. Olive Oil
  • Pinch of Salt


  1. In your mixer, sift together all the flour and salt. 
  2. Create a deep well in your flour and add the eggs and olive oil.
  3. Set the mixer on the slowest speed and using the paddle attachment, mix for 30 seconds.
  4. Add the dough hook attachment and mix on medium low speed for 2 minutes. 
  5. Remove the dough and knead by hand for 5 minutes on a well floured surface.
  6. Divide the dough into grapefruit size balls and wrap each ball in plastic wrap.  Set aside for 30 minutes. 
  7. Once the dough has rested, remove the plastic wrap from each ball, cut into four slices, and flatten each slice to 3/4″ thick. 
  8. Roll each slice through the #1 setting and fold in half.  Repeat several times. 
  9. Switch to #2 setting and send the dough through. 
  10. Switch to #3 setting and send the dough through. 
  11. For fettuccine, send the dough through the #4 setting and then lay the dough flat on a floured surface.  For thinner noodles, such as spaghetti or capellini, send the dough through till the #7 or #8 setting. 
  12. Repeat process for each slice until you have all the dough rolled out into long sheets of pasta. 
  13. Attach the fettuccine cutter and send each sheet through to cut the noodles.  Hang on a laundry drying rack, flour sacks, a shower rod, a broom stick between two chairs, or any other household item that will dry pasta. 
  14. Allow the pasta to dry for at least one hour and then either store in the refrigerator if you will be cooking it within 2 days or freeze it for long term storage. 
  15. When you are ready to cook the fresh pasta, boil 6 quarts of water and add 2 tsp. salt and 1 tsp. olive oil.  Cook the noodles al-dente or for about 6 minutes. 

A West Coast Cooking Lesson from Yours Truly.

I certainly have been a blog slacker lately, but I do have a good excuse…I recently returned from a trip to Seattle, where I visited my dear friend, Niki.  One of the very first places she took me was Pike Place Market.  This place puts my little Farmer’s market to shame!  Gus is lucky that we don’t live in Seattle, or else our grocery bill would be outrageous with all that fresh seafood and produce at my fingertips!  I knew that I could not leave the West Coast without preparing a meal with all those beautiful ingredients, so we returned a couple days later for the goods.  After eyeing the seafood counter, I knew I would definitely need to take advantage of the huge shrimp and decided on a pasta since it’s simple and Italian, and those are the kind of things that I do best.  I also found some beautiful Heirloom tomatoes at the produce stand and Buffalo mozzarella in the Italian market, so Caprese Salad it was!  Such an easy, simple salad, but the fresh ingredients really make this one stand out.  Plus, easy and simple were Nik’s favorite words when it came to the kitchen…

Niki is a wonderful friend with many amazing talents (you should see this girl iron!), but when it comes to cooking…well…let’s just say she is really good at ironing.  I’m kidding.  Kinda.  In her defense, she is good at baking and made my Mama’s Snickers Cake last year all by herself!  (after a little education on Devil’s Food Cake, but we’ll keep that between me and you, Nik.)  She is definitely open to learning about cooking though, so we decided to have a little cooking lesson with all our Pike Place goodies and make an Italian Feast for dinner.   She was the best little curly-headed Sous Chef that I could have asked for, and not only was the meal was excellent, but Nik discovered she’s pretty talented with a knife!  An hour in the kitchen and the girl could chiffonade basil!  I definitely see a marriage proposal in her future now that her boyfriend knows that she’s got one Italian meal under her belt!  😉  It was a wonderful trip with good meals and even better company.  Nik, you can be my Sous Chef anytime…especially when you cut up all the onions, so I don’t cry and ruin my eye makeup! 🙂


Caprese Salad (a fancy name for Tomato, Mozzarella, and Basil Salad)


  • 2 large ripe tomatoes, sliced 1/4 inch thick (Heirloom is best if you can find them, if not then On the Vine tomatoes are a good alternative.)
  • 1 lb fresh Buffalo Mozzarella, sliced 1/4 inch thick
  • 15-20 leaves of fresh Basil (If you have mad knife skills like Nik, then feel free to chiffonade your basil.  If the word chiffonade scares you, then you can just leave the basil leaves whole.)
  • Extra Virgin Olive Oil for drizzling
  • Balsamic Vinegar for drizzling (this one might be controversial…I love the bite of the vinegar, but some people might prefer to leave this out.)
  • Salt/Pepper to taste


  1. Layer alternating slices of tomato and cheese on a large platter.  Add a basil leaf in between slices or sprinkle the basil chiffonade over the top.  Drizzle with Olive Oil and Balsamic Vinegar.  Season to taste. 
  2. That’s it.  You really can’t screw this one up. 


Shrimp Penne in a Tomato Cream Sauce


  • 1 lb. Shrimp, deveined and peeled
  • 3/4 lb. Penne Pasta
  • 3 tbsp Butter
  • 3 tbsp Olive Oil
  • 1 small Onion
  • 3 cloves of Garlic
  • 1/2 cup Dry White Wine (Don’t use something that you wouldn’t drink!)
  • 12 oz can Crushed Tomatoes (If you can find San Marzano, use it!  You will thank me later.)
  • 1 cup Heavy Cream
  • 1 tbsp fresh Flat Leaf Parsley
  • 1 tbsp fresh Basil
  • Salt/Pepper to taste


  1. In a large skillet, heat 1 tbsp. butter and 1 tbsp. Olive Oil.  Add the shrimp and cook for a few minutes until they are just opaque.  Watch them carefully!  They are too expensive to overcook!
  2. Remove the shrimp to a plate and let cool for a couple minutes.
  3. Dice the onion and mince the garlic.  (or if you are me, tell your Sous Chef Niki to do it.  See picture above. )
  4. In a large skillet, heat 2 tbsp. butter and 1 tbsp. Olive Oil.   Add the onion and garlic and saute over medium heat, until soft. 
  5. Remove the tails from the shrimp if you haven’t already and chop the shrimp into bite-size pieces.  Set aside. 
  6. Once the onion and garlic have cooked down a bit, add 1/2 cup of White Wine to the skillet and allow it to evaporate for a few minutes.  Stir occasionally. 
  7. Add the crushed tomatoes to the skillet and stir.  Add the heavy cream and stir until it is fully combined.  Simmer over low heat. 
  8. Cook the penne until al-dente, drain, and set aside.   
  9. Add the shrimp into the sauce and season to taste.  Chop the parsley and basil and add the herbs to the skillet. 
  10.  Add the penne to the sauce and stir to combine. 
  11. Top with fresh Parmigiano-Reggiano and serve with a nice, crusty bread.  Mangia!

Categories